 Tire Patch Basics
What you need to know.
I know many of you runners take up the bicycle in the summer time. It’s great cross training, low impact and lots of fun. It surprises me that anyone who rides a bicycle would not be able to patch or change a tube.
The difficulty level of patching a tube or changing out a tube is so low that you really owe it to yourself to learn how to do it. Getting a flat is like anything else; it will only happen at the most inconvenient time.
What are your alternatives? Walk home pushing the bike? Call your wife/husband to come fetch you? Come on folks! It’s easy! Don’t be beholden to the vagaries of fate. Take control of your ride.
 It’s a handy skill and not at all difficult. It is actually quite routine if you start riding a lot. When I mountain bike ride I might have to fix a flat 2 or even 3 times in a ride. I tend to ride hard and I tend to flat out the rear tire when I’m slamming around in the woods.
What equipment do you need? First you need a way to carry your stuff. You can either throw all the bits and pieces into your back pack or camel back or you can get a seat pack. The seat pack is that small triangle shaped container that straps under and behind your seat. I have a seat pack for both my bikes and I have two sets of patch stuff so that way I never have to think about taking it with me – it’s always there.
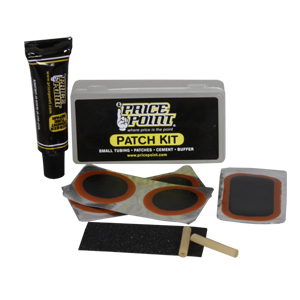
 What’s in the pack? I carry a standard tube patch kit. You can pick these up in any bike shop for a couple bucks. They have a handful of patches and some rubber glue.
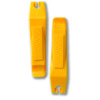
You also need some tire levers. These are also a couple bucks at any bike shop. Make sure they are strong enough to handle the tires you have on the bike. Tire levers come in sets of two. They are small plastic levers designed to let you pry the tire off the rim without damaging anything.
That’s really all you need to patch a tube.
 You will also need a pump to fill it back up. Since you can’t carry your floor pump with you, invest in a portable hand pump. These are also quite reasonable. They are basically 6-8 inches long and about as big around as a cucumber. This pump probably won’t fit in the seat pack. You will either have to use a frame mount for it or throw it in your backpack.
You can get the compressed air cylinders that do fit in the seat pack – but for me that’s just one more thing to worry about. My pump has unlimited air. The cylinder is one time use and if you screw it up you’re up the creek without a paddle.
Sometimes you will damage the tube in such a way that it can’t be fixed with a patch. Because of this I carry an extra tube as well. Fold it up, wrap a rubber band around it and it fits in the seat pack. This way if fixing the tube is too hard I’ll just swap it out and worry about it when I get home.
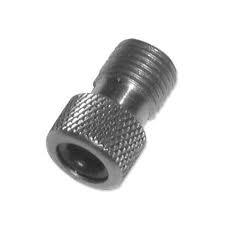
 One thing to remember is that valve stems come in two sizes. The little ones are called Presta valves and the big ones are Shraeder valves. Make sure you know which ones you have on your tubes and your spares and makes sure your pump has the adapter for them.
How do you fix the flat? Stop riding. Flip the bike upside down. Dismount the wheel from the quick release. Use the tire levers to take half of the tire bead off the rim. Fish out the tube. Pump some air into it to find the leak. Patch the leak. Stick the tube back in. Reseat the tire on the bead. Pump it up. Mount the wheel and go. It takes less the 5 minutes.
Go onto YouTube and watch one of the several tire changing videos. Practice patching the tube at home. Go through the motions so you know what to expect and if you have all the pieces you need. Don’t be afraid. As we say up here in Boston “It’s wicked easy!”
